Introduction to Vanilla Pudding Cups Recipe
As a busy mom, I know how precious time can be, especially when it comes to whipping up something sweet. That’s why I adore this Vanilla Pudding Cups Recipe! It’s a simple, delightful treat that can brighten any day. Whether you’re looking to impress your loved ones or just need a quick solution for dessert, these creamy pudding cups are perfect. With just a few ingredients and minimal effort, you can create a dessert that feels special without the fuss. Trust me, your family will be asking for seconds!
Why You’ll Love This Vanilla Pudding Cups Recipe
This Vanilla Pudding Cups Recipe is a lifesaver for busy days. It’s quick to prepare, taking just 10 minutes of your time. The creamy texture and rich vanilla flavor will have your taste buds dancing with joy. Plus, it’s a versatile dessert that can be dressed up or down, making it perfect for any occasion. You’ll love how easy it is to make something that feels indulgent yet simple!
Ingredients for Vanilla Pudding Cups Recipe
Gathering the right ingredients is the first step to creating your delicious Vanilla Pudding Cups. Here’s what you’ll need:
- Milk: The base of your pudding. Whole milk gives a richer flavor, but you can use low-fat if you prefer.
- Granulated Sugar: This sweetens the pudding. Feel free to adjust the amount based on your taste.
- Cornstarch: This thickens the pudding, giving it that creamy texture we all love.
- Salt: Just a pinch enhances the sweetness and balances the flavors.
- Vanilla Extract: The star of the show! It adds that warm, comforting vanilla flavor.
- Butter: A little bit of butter makes the pudding extra smooth and rich.
For those who want to get creative, consider adding:
- Whipped Cream: A dollop on top makes for a beautiful presentation.
- Fresh Fruit: Strawberries or blueberries can add a refreshing twist.
- Chocolate Chips: For a fun variation, sprinkle some on top for a chocolatey surprise.
All the exact measurements for these ingredients are at the bottom of the article, ready for you to print and use!
How to Make Vanilla Pudding Cups Recipe
Now that you have your ingredients ready, let’s dive into the fun part—making these delightful Vanilla Pudding Cups! Follow these simple steps, and you’ll have a creamy dessert that’s sure to impress.
Step 1: Whisk the Dry Ingredients
Start by grabbing a medium saucepan. In it, combine the granulated sugar, cornstarch, and salt. Whisk them together until they’re well blended. This step is crucial because it ensures that the cornstarch is evenly distributed, preventing any lumps later on. Trust me, a smooth pudding is a happy pudding!
Step 2: Add the Milk
Next, it’s time to add the milk. Gradually pour in the milk while whisking continuously. This helps to avoid any pesky lumps from forming. Keep whisking until the mixture is smooth and well combined. It’s like giving your pudding a little spa treatment—smooth and silky is the goal!
Step 3: Cook the Mixture
Now, place the saucepan over medium heat. Stir the mixture constantly as it heats up. You’ll notice it starting to thicken after a few minutes. Keep stirring until it reaches a gentle boil. This is where the magic happens! The pudding transforms from a liquid to a creamy delight. Just be patient; it’s worth the wait!
Step 4: Add Flavorings
Once your pudding has thickened, remove it from the heat. Stir in the vanilla extract and butter until everything is melted and smooth. The aroma of vanilla will fill your kitchen, making it feel like a warm hug. This is the moment when your pudding goes from good to absolutely heavenly!
Step 5: Pour and Cool
Carefully pour the pudding into individual cups. I like to use clear cups so everyone can see that creamy goodness. Let them cool at room temperature for a bit. This step is important because it allows the pudding to set properly. Plus, it gives you a moment to admire your handiwork!
Step 6: Refrigerate
Finally, pop those cups into the refrigerator. Chill them for at least two hours before serving. This step is key to achieving that perfect, creamy texture. When you’re ready to serve, you can top them with whipped cream or fresh fruit for an extra touch. Enjoy your delicious Vanilla Pudding Cups!
Tips for Success
- Always whisk the dry ingredients thoroughly to prevent lumps.
- Use whole milk for a creamier texture; it makes a big difference!
- Don’t rush the cooking process; stirring constantly ensures even thickening.
- Let the pudding cool slightly before refrigerating for the best results.
- Feel free to experiment with toppings to make it your own!
Equipment Needed
- Medium Saucepan: A sturdy pot is essential. If you don’t have one, a large skillet can work too.
- Whisk: A whisk is perfect for mixing. A fork can also do the job in a pinch.
- Measuring Cups: Accurate measurements are key. If you’re in a hurry, use any cup you have on hand.
- Individual Cups: Clear cups are great for presentation. Any small bowls will work just fine!
Variations of Vanilla Pudding Cups Recipe
- Chocolate Pudding Cups: Substitute half of the cornstarch with cocoa powder for a rich chocolate flavor.
- Almond Vanilla Pudding: Replace vanilla extract with almond extract for a nutty twist.
- Vegan Option: Use almond or coconut milk and replace butter with coconut oil for a dairy-free version.
- Spiced Pudding: Add a pinch of cinnamon or nutmeg for a warm, spiced flavor.
- Fruit-Infused Pudding: Stir in pureed fruit like strawberries or mango for a fruity variation.
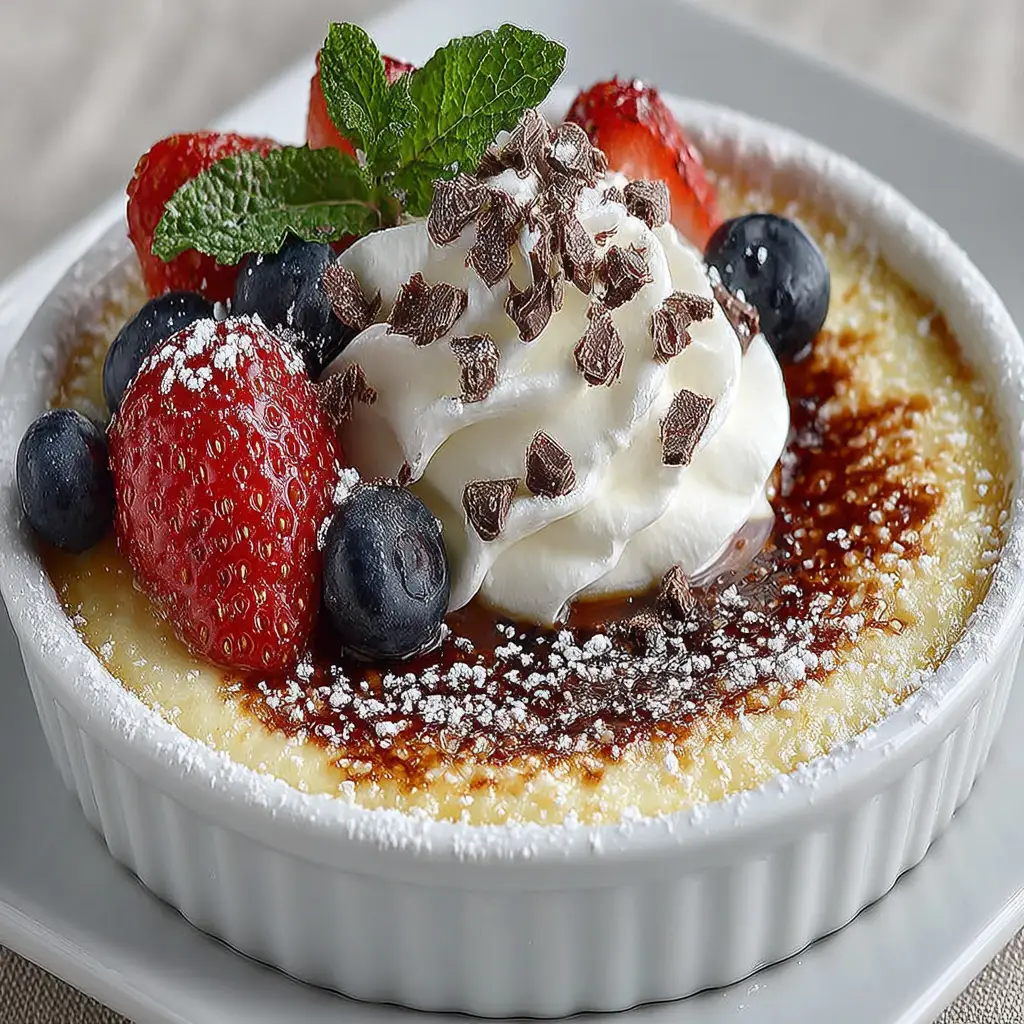
Serving Suggestions for Vanilla Pudding Cups Recipe
- Top with Whipped Cream: A dollop of whipped cream adds a light, airy touch.
- Fresh Berries: Strawberries or blueberries provide a burst of color and flavor.
- Chocolate Shavings: Sprinkle some chocolate shavings for an elegant finish.
- Mint Leaves: A sprig of mint adds a refreshing touch.
- Pair with Coffee: Serve alongside a warm cup of coffee for a delightful dessert experience.
FAQs about Vanilla Pudding Cups Recipe
As you embark on your journey to create these delightful Vanilla Pudding Cups, you might have a few questions. Here are some common queries I’ve encountered, along with helpful answers to guide you along the way.
Can I make Vanilla Pudding Cups in advance?
Absolutely! These pudding cups can be made a day in advance. Just prepare them, let them cool, and refrigerate. This makes them a perfect dessert for busy days or gatherings.
What can I use instead of cornstarch?
If you don’t have cornstarch on hand, you can use all-purpose flour as a thickening agent. Just remember to use about twice the amount of flour compared to cornstarch.
How long do Vanilla Pudding Cups last in the fridge?
These creamy treats can last up to 3 days in the refrigerator. Just make sure to cover them well to keep them fresh and delicious!
Can I use non-dairy milk for this recipe?
Yes! Almond milk, coconut milk, or oat milk can be great substitutes. Just keep in mind that the flavor and texture may vary slightly, but they’ll still be delicious!
What toppings work best with Vanilla Pudding Cups?
There are so many options! Whipped cream, fresh fruit, chocolate shavings, or even a sprinkle of nuts can elevate your pudding cups. Get creative and make them your own!
Final Thoughts
Creating these Vanilla Pudding Cups is more than just making a dessert; it’s about bringing joy to your kitchen and your family. The creamy texture and rich vanilla flavor can turn an ordinary day into something special. I love how this recipe allows for creativity, whether through toppings or variations. Plus, it’s a fantastic way to involve your kids in the kitchen, making memories together. So, the next time you need a quick treat or a sweet surprise, remember this delightful Vanilla Pudding Cups Recipe. It’s sure to bring smiles all around!
Print
Vanilla Pudding Cups Recipe: A Simple, Delightful Treat!
- Total Time: 2 hours 20 minutes
- Yield: 4 servings 1x
- Diet: Vegetarian
Description
A simple and delightful recipe for creamy vanilla pudding cups, perfect for any occasion.
Ingredients
- 2 cups milk
- 1/2 cup granulated sugar
- 1/4 cup cornstarch
- 1/4 teaspoon salt
- 2 teaspoons vanilla extract
- 2 tablespoons butter
Instructions
- In a medium saucepan, whisk together the sugar, cornstarch, and salt.
- Gradually add the milk while whisking to combine.
- Cook over medium heat, stirring constantly until the mixture thickens and starts to boil.
- Remove from heat and stir in the vanilla extract and butter until smooth.
- Pour the pudding into individual cups and let it cool to room temperature.
- Refrigerate for at least 2 hours before serving.
Notes
- For a richer flavor, use whole milk instead of low-fat milk.
- Top with whipped cream or fresh fruit for added decoration.
- This pudding can be made a day in advance for convenience.
- Prep Time: 10 minutes
- Cook Time: 10 minutes
- Category: Dessert
- Method: Stovetop
- Cuisine: American
Nutrition
- Serving Size: 1 cup
- Calories: 200
- Sugar: 20g
- Sodium: 150mg
- Fat: 8g
- Saturated Fat: 5g
- Unsaturated Fat: 3g
- Trans Fat: 0g
- Carbohydrates: 30g
- Fiber: 0g
- Protein: 4g
- Cholesterol: 20mg