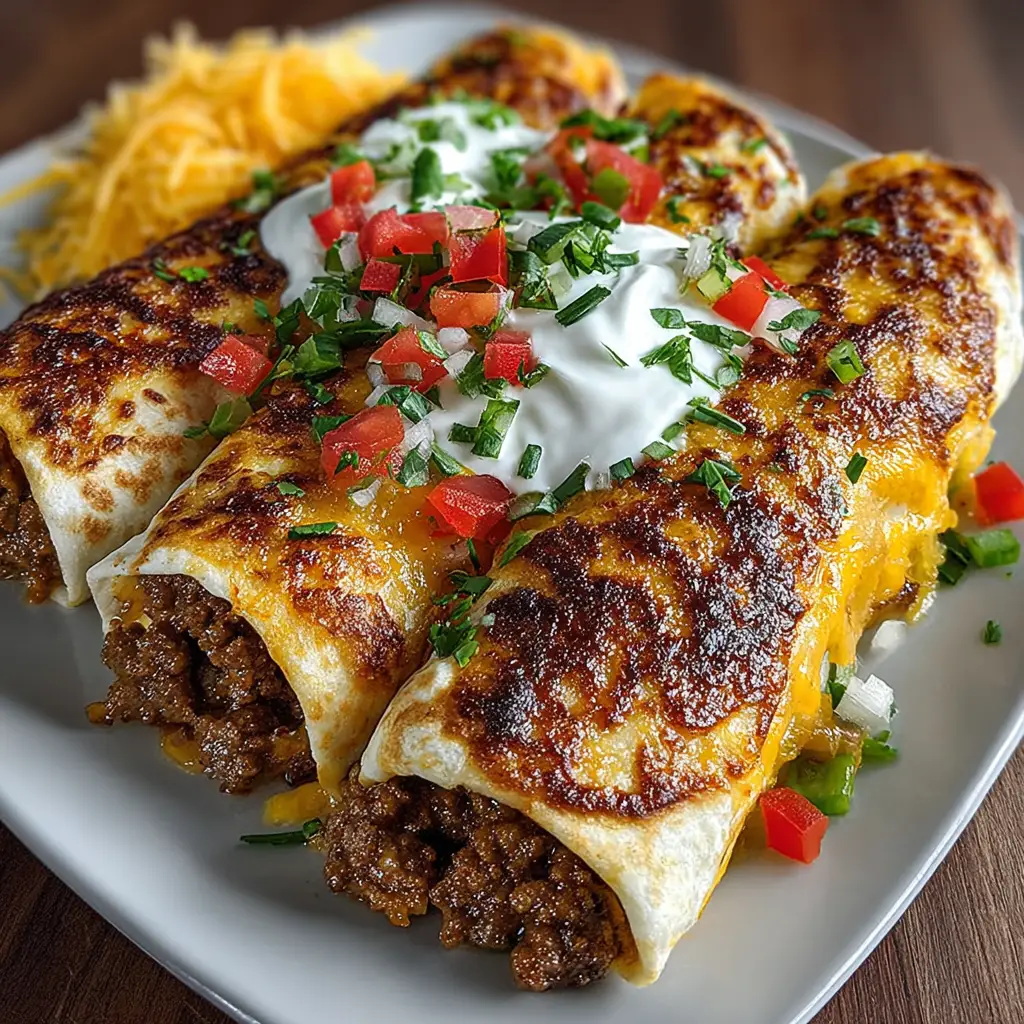
Introduction to Cheesy Beefy Roll-Ups Recipe
As a busy mom, I know how challenging it can be to whip up a meal that pleases everyone. That’s where my Cheesy Beefy Roll-Ups Recipe comes in! These delightful roll-ups are not only easy to make but also packed with flavor. Imagine seasoned ground beef and gooey cheese wrapped snugly in a warm tortilla—it’s comfort food at its finest. Whether you’re looking for a quick solution for a hectic weeknight dinner or a fun snack for the kids, these roll-ups are sure to impress your loved ones and satisfy those hungry bellies!
Why You’ll Love This Cheesy Beefy Roll-Ups Recipe
Let’s face it—life gets busy, and finding time to cook can feel like a juggling act. That’s why I adore this Cheesy Beefy Roll-Ups Recipe. It’s quick, taking just 30 minutes from start to finish, and the taste? Absolutely irresistible! The combination of savory beef and melty cheese wrapped in a tortilla is a crowd-pleaser. Plus, you can customize it to suit your family’s tastes, making it a win-win for everyone!
Ingredients for Cheesy Beefy Roll-Ups Recipe
Gathering the right ingredients is the first step to creating these mouthwatering Cheesy Beefy Roll-Ups. Here’s what you’ll need:
- Ground Beef: The star of the show! I prefer lean ground beef for a healthier option, but feel free to use your favorite type.
- Shredded Cheese: Cheddar or mozzarella works beautifully. The gooeyness of melted cheese is what makes these roll-ups so irresistible!
- Flour Tortillas: Large tortillas are perfect for wrapping up all that delicious filling. You can also use whole wheat or corn tortillas for a different twist.
- Diced Onions: They add a sweet and savory flavor. If you’re not a fan, you can skip them or use green onions instead.
- Diced Bell Peppers: These add a pop of color and crunch. Any color works, but I love using a mix for visual appeal.
- Garlic Powder: A must-have for that extra depth of flavor. Fresh garlic can be used too, just adjust the amount.
- Onion Powder: This enhances the onion flavor without the texture. It’s a great shortcut for busy cooks!
- Salt and Pepper: Essential for seasoning. Don’t be shy—season to your taste!
- Cooking Oil: For frying the roll-ups. Olive oil or vegetable oil works well, but you can also bake them for a healthier option.
Feel free to get creative! You can add jalapeños for a spicy kick or even some black beans for extra protein. The exact quantities for each ingredient are listed at the bottom of the article, ready for printing when you’re ready to cook!
How to Make Cheesy Beefy Roll-Ups Recipe
Now that you have all your ingredients ready, let’s dive into the fun part—making these Cheesy Beefy Roll-Ups! Follow these simple steps, and you’ll have a delicious meal in no time.
Step 1: Sauté the Vegetables
Start by heating a splash of cooking oil in a skillet over medium heat. Once the oil is hot, toss in the diced onions and bell peppers. Sauté them for about 3-4 minutes until they’re soft and fragrant. The aroma will make your kitchen feel like a cozy restaurant!
Step 2: Cook the Ground Beef
Next, add the ground beef to the skillet. Break it up with a spatula as it cooks. Season it with garlic powder, onion powder, salt, and pepper. Cook until the beef is browned and no longer pink, which should take about 5-7 minutes. This step is crucial for building flavor!
Step 3: Melt the Cheese
Once the beef is cooked, remove the skillet from heat. Stir in the shredded cheese until it melts into the beef mixture. The gooey cheese will bind everything together, creating a delicious filling that’s hard to resist!
Step 4: Prepare the Tortillas
Now, lay a tortilla flat on a clean surface. Spoon a generous portion of the beef and cheese mixture into the center of the tortilla. Don’t be shy—this is where the magic happens!
Step 5: Roll and Secure
Carefully roll the tortilla tightly around the filling. If you’re worried about it unrolling, secure it with a toothpick. This will keep all that cheesy goodness inside while frying!
Step 6: Fry the Roll-Ups
Return the skillet to the heat and add a bit more oil if needed. Fry the roll-ups in batches, turning them until they’re golden brown on all sides. This should take about 3-4 minutes per side. The crispy exterior is what makes these roll-ups so delightful!
Step 7: Cool and Serve
Once they’re golden and crispy, remove the roll-ups from the skillet and let them cool slightly on a paper towel. This will help absorb any excess oil. Serve them warm, and watch your family devour them!
Tips for Success
- Prep your ingredients ahead of time to save precious minutes during cooking.
- Don’t overcrowd the skillet when frying; this ensures even cooking and crispiness.
- Experiment with different cheeses for unique flavors—pepper jack adds a nice kick!
- For a healthier option, bake the roll-ups at 400°F for about 15 minutes instead of frying.
- Serve with your favorite dipping sauces for an extra flavor boost!
Equipment Needed
- Skillet: A non-stick skillet works best, but any frying pan will do.
- Spatula: Use a sturdy spatula for flipping the roll-ups easily.
- Toothpicks: Handy for securing the roll-ups, but you can skip them if you roll tightly.
- Paper Towels: Great for draining excess oil after frying.
Variations of Cheesy Beefy Roll-Ups Recipe
- Spicy Kick: Add diced jalapeños or a splash of hot sauce to the beef mixture for a fiery twist.
- Veggie Delight: Substitute half of the ground beef with black beans or lentils for a vegetarian option.
- Cheesy Medley: Mix different types of cheese like pepper jack, gouda, or feta for a flavor explosion.
- Herb Infusion: Add fresh herbs like cilantro or parsley to the filling for a burst of freshness.
- Breakfast Roll-Ups: Use scrambled eggs and breakfast sausage instead of ground beef for a hearty breakfast treat.
Serving Suggestions for Cheesy Beefy Roll-Ups Recipe
- Pair with a fresh garden salad for a light and balanced meal.
- Serve with salsa, guacamole, or sour cream for dipping—these add a delightful zing!
- A side of crispy tortilla chips complements the roll-ups perfectly.
- For drinks, consider a refreshing iced tea or a fruity mocktail.
- Garnish with fresh cilantro or parsley for a pop of color and flavor.
FAQs about Cheesy Beefy Roll-Ups Recipe
Can I make Cheesy Beefy Roll-Ups ahead of time?
Absolutely! You can prepare the filling in advance and store it in the fridge. Just assemble and fry the roll-ups when you’re ready to serve. This makes for a quick meal on busy days!
Can I bake the roll-ups instead of frying them?
Yes! For a healthier option, preheat your oven to 400°F and bake the roll-ups for about 15 minutes. This will give them a nice crisp without the extra oil.
What can I serve with Cheesy Beefy Roll-Ups?
These roll-ups pair wonderfully with salsa, guacamole, or sour cream for dipping. A fresh salad or crispy tortilla chips on the side also make great accompaniments!
How do I store leftovers?
Store any leftover roll-ups in an airtight container in the fridge for up to 3 days. Reheat them in the oven or skillet to maintain their crispiness.
Can I customize the filling?
Definitely! Feel free to add your favorite ingredients like black beans, corn, or different cheeses. The Cheesy Beefy Roll-Ups Recipe is versatile and can be tailored to your family’s tastes!
Final Thoughts
Cooking should be a joyful experience, and my Cheesy Beefy Roll-Ups Recipe embodies that spirit. It’s not just about the delicious flavors; it’s about gathering around the table with loved ones, sharing laughter, and creating memories. These roll-ups are a fantastic way to bring everyone together, whether it’s a busy weeknight or a fun weekend gathering. Plus, the ease of preparation means you can spend less time in the kitchen and more time enjoying the company of family and friends. So, roll up your sleeves and dive into this delightful dish—you won’t regret it!
Print
Cheesy Beefy Roll-Ups Recipe: Irresistibly Delicious & Easy!
- Total Time: 30 minutes
- Yield: 4 servings 1x
- Diet: Low Calorie
Description
Cheesy Beefy Roll-Ups are a delicious and easy-to-make dish that combines seasoned ground beef and gooey cheese wrapped in tortillas, perfect for a quick meal or snack.
Ingredients
- 1 lb ground beef
- 1 cup shredded cheese (cheddar or mozzarella)
- 4 large flour tortillas
- 1/2 cup diced onions
- 1/2 cup diced bell peppers
- 1 tsp garlic powder
- 1 tsp onion powder
- Salt and pepper to taste
- Cooking oil for frying
Instructions
- In a skillet, heat a little oil over medium heat and sauté the onions and bell peppers until soft.
- Add the ground beef to the skillet and cook until browned, seasoning with garlic powder, onion powder, salt, and pepper.
- Once the beef is cooked, remove from heat and stir in the shredded cheese until melted.
- Lay a tortilla flat and place a portion of the beef and cheese mixture in the center.
- Roll the tortilla tightly around the filling and secure with a toothpick if necessary.
- In the same skillet, add more oil if needed and fry the roll-ups until golden brown on all sides.
- Remove from the skillet and let cool slightly before serving.
Notes
- Feel free to add other ingredients like jalapeños for extra spice.
- These roll-ups can be baked instead of fried for a healthier option.
- Serve with salsa or sour cream for dipping.
- Prep Time: 15 minutes
- Cook Time: 15 minutes
- Category: Appetizer
- Method: Frying
- Cuisine: American
Nutrition
- Serving Size: 1 roll-up
- Calories: 250
- Sugar: 1g
- Sodium: 400mg
- Fat: 15g
- Saturated Fat: 7g
- Unsaturated Fat: 5g
- Trans Fat: 0g
- Carbohydrates: 20g
- Fiber: 1g
- Protein: 15g
- Cholesterol: 50mg