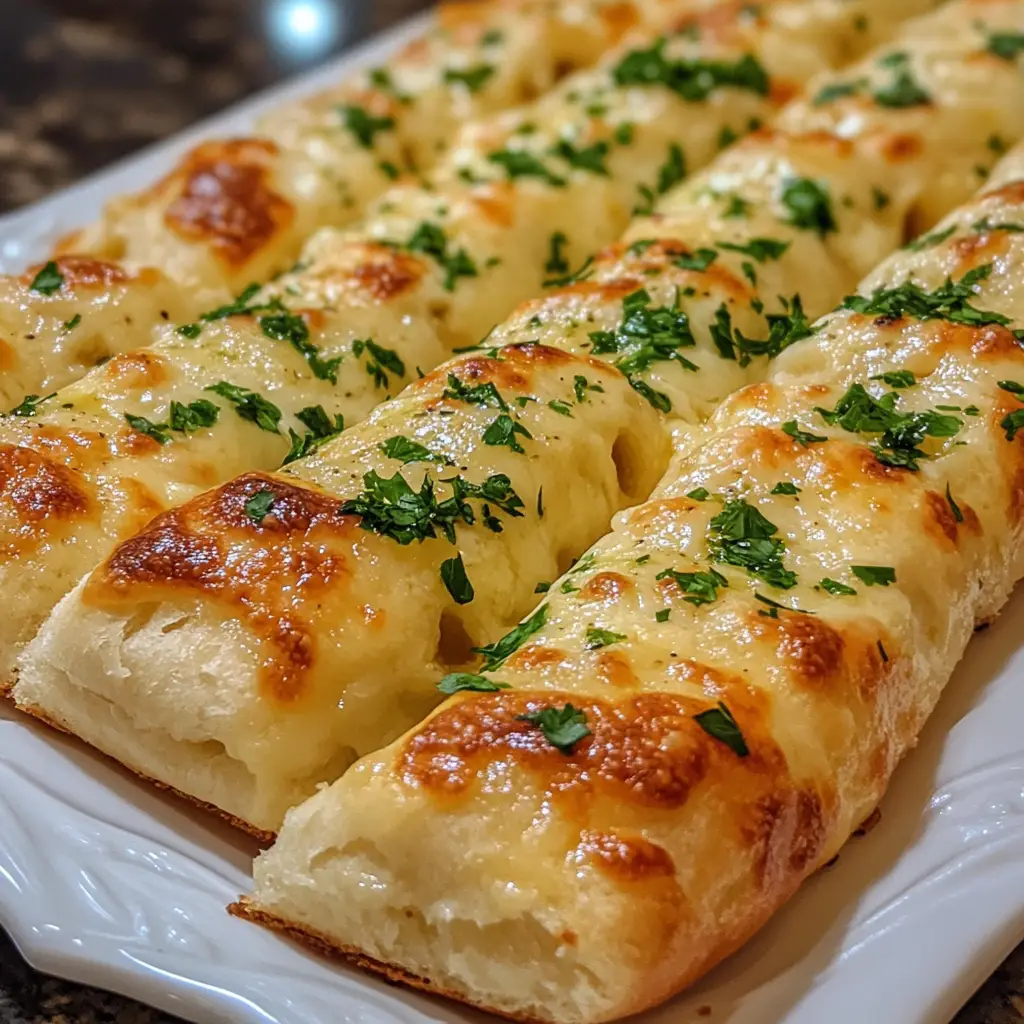
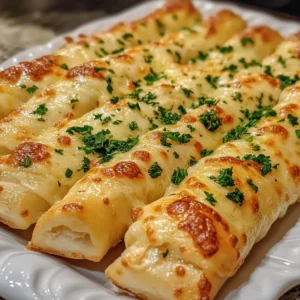
Introduction to Homemade Cheesy Garlic Breadsticks
There’s something magical about the aroma of freshly baked breadsticks wafting through the kitchen. When I think of comfort food, Homemade Cheesy Garlic Breadsticks instantly come to mind. They’re not just a treat; they’re a quick solution for those busy weeknights when you want to impress your family without spending hours in the kitchen. Whether it’s a cozy family dinner or a gathering with friends, these cheesy delights are sure to wow your taste buds and bring smiles all around. Trust me, once you try them, you’ll be hooked!
Why You’ll Love This Homemade Cheesy Garlic Breadsticks
These Homemade Cheesy Garlic Breadsticks are a game-changer for busy moms and professionals alike. They come together in no time, making them perfect for those hectic evenings. The combination of gooey cheese and aromatic garlic creates a flavor explosion that’s hard to resist. Plus, they’re versatile enough to pair with any meal or stand alone as a delightful snack. You’ll love how easy they are to whip up!
Ingredients for Homemade Cheesy Garlic Breadsticks
Gathering the right ingredients is the first step to creating these delightful Homemade Cheesy Garlic Breadsticks. Here’s what you’ll need:
- Warm water: This activates the yeast, creating that fluffy texture we all love.
- Active dry yeast: The magic ingredient that makes the dough rise and gives it a light, airy feel.
- Sugar: Just a touch to feed the yeast and enhance the flavor.
- Olive oil: Adds richness and helps keep the breadsticks moist.
- All-purpose flour: The backbone of the dough, providing structure and chewiness.
- Salt: Essential for flavor; it balances the sweetness of the dough.
- Shredded mozzarella cheese: The star of the show, melting beautifully for that cheesy goodness.
- Grated Parmesan cheese: Adds a nutty flavor that complements the mozzarella perfectly.
- Minced garlic: The aromatic hero that brings a burst of flavor to each bite.
- Melted butter: This is brushed on top for a golden finish and extra richness.
- Dried oregano and parsley: These herbs add a touch of Italian flair and freshness.
For those who like a little heat, consider adding red pepper flakes to the garlic butter mixture. You can also serve these breadsticks with marinara sauce for dipping, which is a delightful pairing!
Exact measurements for each ingredient can be found at the bottom of the article, ready for you to print and take to the kitchen.
How to Make Homemade Cheesy Garlic Breadsticks
Now that you have all your ingredients ready, let’s dive into the fun part: making these Homemade Cheesy Garlic Breadsticks. Follow these simple steps, and you’ll have a delicious treat in no time!
Step 1: Prepare the Yeast Mixture
Start by combining warm water, active dry yeast, and sugar in a bowl. Stir gently and let it sit for about 5 minutes. You’ll know it’s ready when it becomes frothy and bubbly. This is the yeast waking up, and it’s a crucial step for that perfect rise!
Step 2: Make the Dough
Once your yeast mixture is frothy, add olive oil, all-purpose flour, and salt. Mix everything together until a dough starts to form. It should be slightly sticky but manageable. If it’s too wet, sprinkle in a bit more flour until it feels just right.
Step 3: Knead the Dough
Now, it’s time to knead! Dust your countertop with flour and turn the dough out onto it. Knead for about 5 minutes until the dough is smooth and elastic. Think of it as giving your dough a little workout. This step is key to developing that lovely texture!
Step 4: Let the Dough Rise
Place the kneaded dough in a greased bowl, turning it to coat all sides. Cover it with a clean kitchen towel and let it rise in a warm spot for about 1 hour. You want it to double in size, which means it’s ready to become those cheesy breadsticks we all love.
Step 5: Preheat the Oven
While the dough is rising, preheat your oven to 400°F (200°C). This ensures that your breadsticks will bake evenly and come out perfectly golden brown. Trust me, the smell will be irresistible!
Step 6: Shape the Dough
After the dough has risen, punch it down gently to release the air. Turn it out onto a floured surface and roll it into a rectangle. Aim for about ½ inch thick. This is where the magic happens, as you prepare it for all that cheesy goodness!
Step 7: Prepare the Garlic Butter Mixture
In a small bowl, mix together melted butter, minced garlic, dried oregano, and parsley. This mixture is what will give your breadsticks that mouthwatering flavor. Brush it generously over the rolled-out dough, making sure every inch is covered.
Step 8: Assemble the Breadsticks
Now, sprinkle the shredded mozzarella and grated Parmesan cheese evenly over the top. Don’t be shy with the cheese! It’s what makes these Homemade Cheesy Garlic Breadsticks so delightful. Cut the dough into strips using a pizza cutter or a sharp knife.
Step 9: Bake the Breadsticks
Transfer the cut breadsticks to a greased baking sheet. Bake them in your preheated oven for 15-20 minutes, or until they’re golden brown and the cheese is bubbly. Keep an eye on them; you want that perfect golden hue!
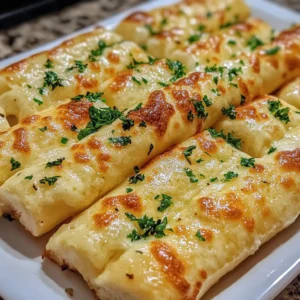
Step 10: Serve and Enjoy
Once baked, remove the breadsticks from the oven and let them cool slightly. This will make them easier to cut. Slice them into sticks and serve warm. They’re perfect on their own or with a side of marinara sauce for dipping!
Tips for Success
- Make sure your water is warm, not hot, to avoid killing the yeast.
- Don’t rush the rising time; it’s crucial for fluffy breadsticks.
- Use fresh garlic for the best flavor; it makes a world of difference.
- Experiment with different cheeses like cheddar for a unique twist.
- For extra crunch, sprinkle some coarse sea salt on top before baking.
Equipment Needed
- Mixing bowl: A large bowl for combining ingredients; any bowl will do!
- Measuring cups and spoons: Essential for accuracy; use a kitchen scale if you prefer.
- Rolling pin: For rolling out the dough; a wine bottle works in a pinch!
- Baking sheet: A standard sheet will suffice; line it with parchment for easy cleanup.
- Pizza cutter or sharp knife: For cutting the breadsticks; kitchen scissors can also work.
Variations
- Herb-Infused: Add fresh herbs like basil or thyme to the garlic butter for an aromatic twist.
- Cheesy Jalapeño: Mix in diced jalapeños with the cheese for a spicy kick that’s sure to please!
- Whole Wheat Option: Substitute half of the all-purpose flour with whole wheat flour for a healthier version.
- Vegan Version: Use plant-based butter and cheese alternatives to make these breadsticks vegan-friendly.
- Stuffed Breadsticks: Roll the dough around your favorite fillings, like pepperoni or spinach, before baking.
Serving Suggestions
- Pair your Homemade Cheesy Garlic Breadsticks with a fresh garden salad for a balanced meal.
- Serve alongside a warm bowl of marinara sauce for dipping; it’s a classic combo!
- For drinks, consider a crisp white wine or sparkling water with lemon.
- Presentation tip: Arrange the breadsticks in a basket lined with a colorful napkin for a charming touch.
FAQs about Homemade Cheesy Garlic Breadsticks
Can I make the dough ahead of time?
Absolutely! You can prepare the dough and let it rise, then cover it and refrigerate for up to 24 hours. Just bring it back to room temperature before shaping and baking. This is a great time-saver for busy days!
What can I serve with Homemade Cheesy Garlic Breadsticks?
These breadsticks pair wonderfully with marinara sauce for dipping. You can also serve them alongside a hearty soup or salad for a complete meal. They’re versatile enough to complement any dish!
How do I store leftovers?
Store any leftover Homemade Cheesy Garlic Breadsticks in an airtight container at room temperature for up to 2 days. You can also freeze them for longer storage. Just reheat in the oven for that fresh-baked taste!
Can I use different types of cheese?
Definitely! While mozzarella and Parmesan are classic choices, feel free to experiment with other cheeses like cheddar, gouda, or even feta for a unique flavor twist. The possibilities are endless!
What if my breadsticks don’t rise?
If your dough doesn’t rise, it could be due to inactive yeast. Make sure your water is warm, not hot, and check the expiration date on your yeast. If it’s frothy after mixing, you’re good to go!
Final Thoughts
Making Homemade Cheesy Garlic Breadsticks is more than just a cooking task; it’s a delightful experience that brings joy to your kitchen. The aroma of garlic and melted cheese fills the air, creating a warm, inviting atmosphere. Whether you’re sharing them with family or enjoying them solo, these breadsticks are sure to elevate any meal. They remind us that simple ingredients can create something truly special. So, roll up your sleeves, embrace the process, and let these cheesy delights become a staple in your home. Trust me, your taste buds will thank you!
Print
Homemade Cheesy Garlic Breadsticks That Wow Your Taste Buds!
- Total Time: 1 hour 35 minutes
- Yield: 12 breadsticks 1x
- Diet: Vegetarian
Description
Delicious homemade cheesy garlic breadsticks that are perfect for any occasion.
Ingredients
- 1 cup warm water (110°F)
- 2 1/4 teaspoons active dry yeast
- 2 tablespoons sugar
- 2 tablespoons olive oil
- 3 cups all-purpose flour
- 1 teaspoon salt
- 1/2 cup shredded mozzarella cheese
- 1/4 cup grated Parmesan cheese
- 4 cloves garlic, minced
- 2 tablespoons butter, melted
- 1 teaspoon dried oregano
- 1 teaspoon dried parsley
Instructions
- In a bowl, combine warm water, yeast, and sugar. Let it sit for 5 minutes until frothy.
- Add olive oil, flour, and salt to the yeast mixture. Mix until a dough forms.
- Knead the dough on a floured surface for about 5 minutes until smooth.
- Place the dough in a greased bowl, cover, and let it rise for 1 hour or until doubled in size.
- Preheat the oven to 400°F (200°C).
- Punch down the dough and roll it out into a rectangle on a floured surface.
- Transfer the dough to a greased baking sheet.
- In a small bowl, mix melted butter, minced garlic, oregano, and parsley. Brush this mixture over the dough.
- Sprinkle mozzarella and Parmesan cheese evenly over the top.
- Bake for 15-20 minutes or until golden brown.
- Remove from the oven, let cool slightly, and cut into sticks.
Notes
- For extra flavor, add red pepper flakes to the garlic butter mixture.
- Serve with marinara sauce for dipping.
- Store leftovers in an airtight container for up to 2 days.
- Prep Time: 15 minutes
- Cook Time: 20 minutes
- Category: Appetizer
- Method: Baking
- Cuisine: Italian
Nutrition
- Serving Size: 1 breadstick
- Calories: 150
- Sugar: 1g
- Sodium: 200mg
- Fat: 6g
- Saturated Fat: 3g
- Unsaturated Fat: 2g
- Trans Fat: 0g
- Carbohydrates: 20g
- Fiber: 1g
- Protein: 5g
- Cholesterol: 15mg