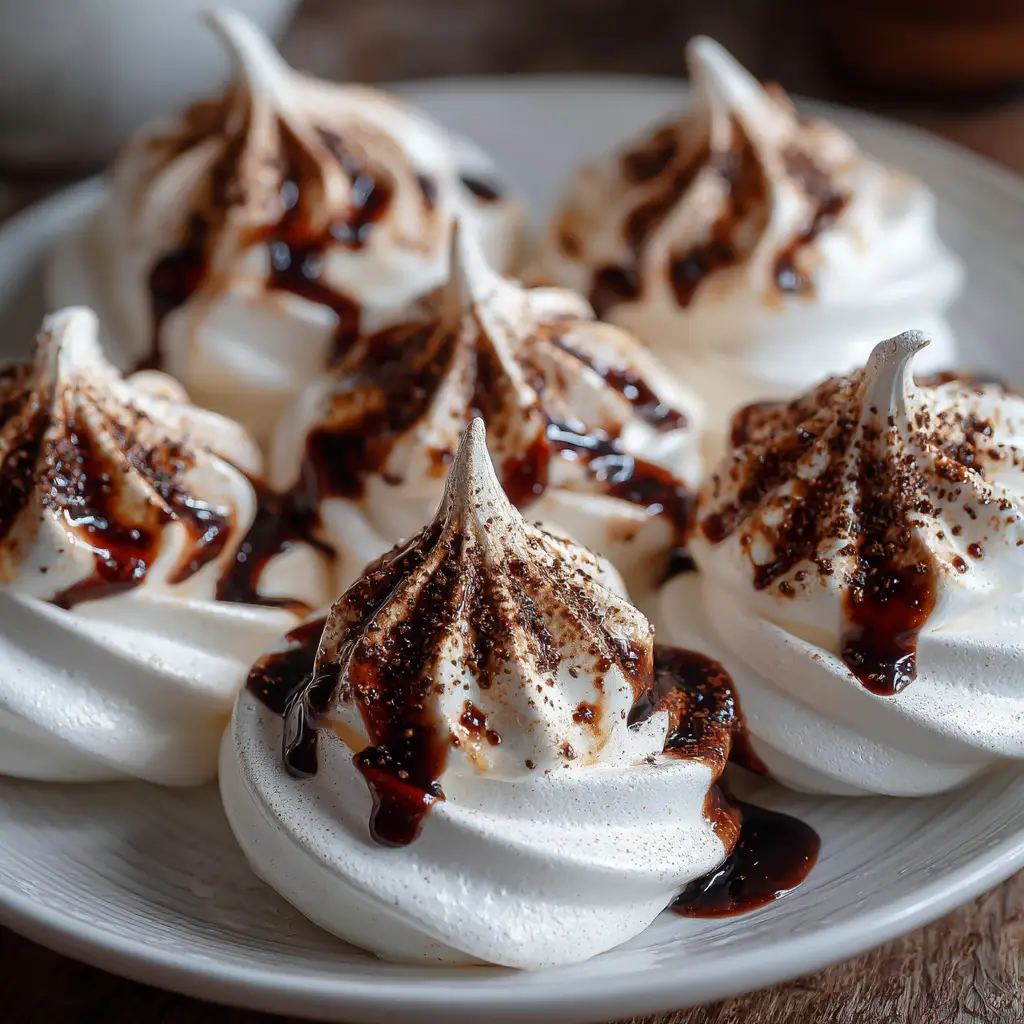
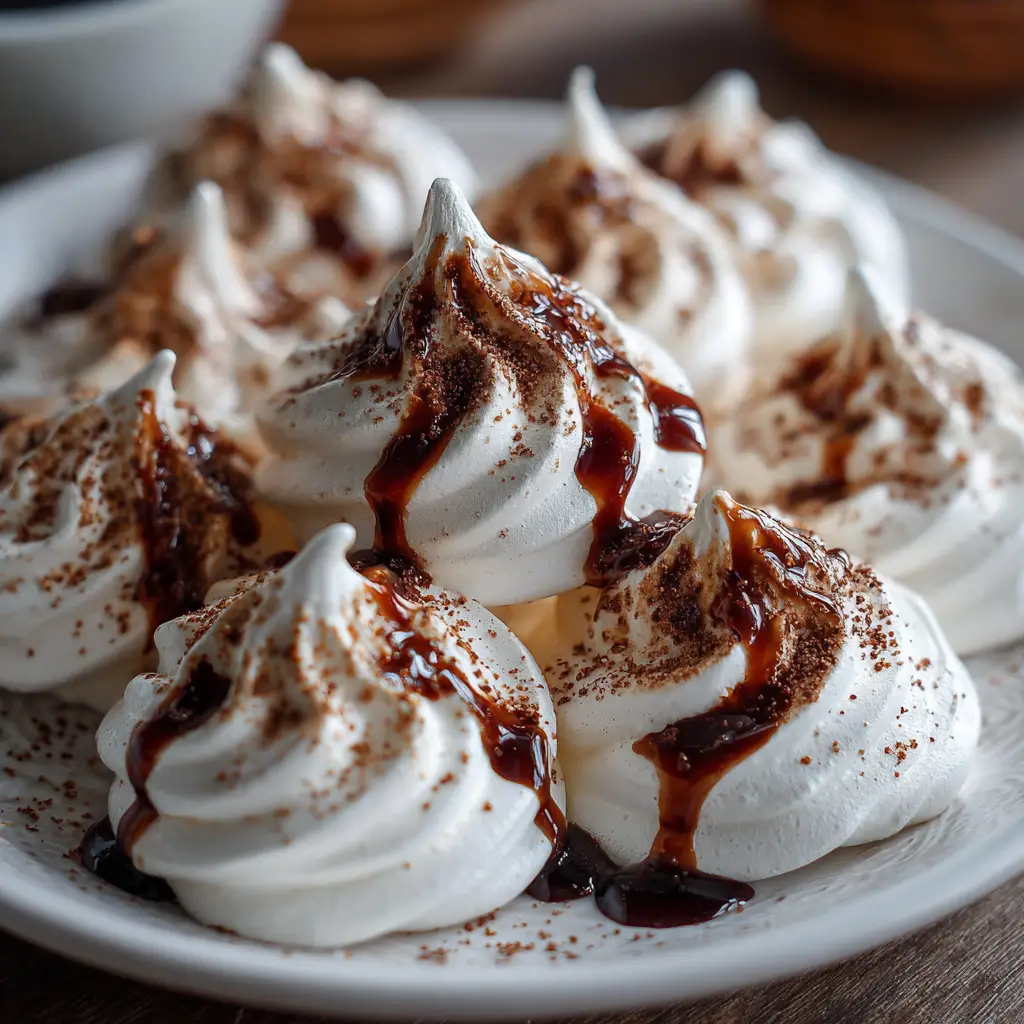
Introduction to Ghost Meringue Cookies
As the leaves turn and the air gets crisp, I find myself dreaming of delightful treats that capture the spirit of the season. Enter my Ghost Meringue Cookies! These whimsical, airy confections are not just perfect for Halloween; they’re a fun way to bring a little magic to any gathering. If you’re a busy mom or professional like me, you’ll appreciate how quick and easy these cookies are to whip up. Plus, they’re sure to impress your loved ones with their spooky charm and melt-in-your-mouth texture. Let’s dive into this delicious adventure!
Why You’ll Love This Ghost Meringue Cookies
These Ghost Meringue Cookies are a delightful treat that combines ease and elegance. They come together quickly, making them perfect for busy days when you want to whip up something special. The light, airy texture is simply irresistible, and the spooky design adds a fun twist. Plus, they’re a hit with kids and adults alike, making them a fantastic addition to any festive occasion!
Ingredients for Ghost Meringue Cookies
To create these delightful Ghost Meringue Cookies, you’ll need a handful of simple ingredients that come together to form a magical treat. Here’s what you’ll need:
- Egg Whites: The star of the show! They provide the structure and airy texture that makes meringues so light.
- Cream of Tartar: This little ingredient helps stabilize the egg whites, ensuring they whip up to fluffy perfection.
- Granulated Sugar: Sweetness is key! It not only sweetens the meringue but also helps achieve that glossy finish.
- Vanilla Extract: A splash of this adds a warm, comforting flavor that complements the sweetness beautifully.
- Almond Extract: Just a hint of almond gives a delightful twist to the flavor profile, making these cookies even more special.
- Chocolate Chips: These are for the eyes! Use mini chocolate chips for a cute, spooky touch that kids will love.
Feel free to get creative! You can add food coloring to the meringue for a fun twist, or swap out the almond extract for another flavor if you prefer. For exact measurements, check the bottom of the article where you can find everything you need for printing.
How to Make Ghost Meringue Cookies
Now that we have our ingredients ready, let’s dive into the fun part—making these delightful Ghost Meringue Cookies! Follow these simple steps, and you’ll have a spooky treat that’s sure to impress.
Step 1: Preheat the Oven
First things first, preheat your oven to 225°F (110°C). This low temperature is crucial for drying out the meringues without browning them. While the oven warms up, line a baking sheet with parchment paper. This will prevent the meringues from sticking and make cleanup a breeze!
Step 2: Beat the Egg Whites
In a clean, dry bowl, add your egg whites and cream of tartar. Using an electric mixer, beat them on medium speed until soft peaks form. Soft peaks mean the mixture holds a gentle shape but still droops slightly. The cream of tartar is your secret weapon here; it stabilizes the egg whites, helping them whip up beautifully!
Step 3: Add Sugar Gradually
Once you have those soft peaks, it’s time to sweeten the deal! Gradually add the granulated sugar, a tablespoon at a time, while continuing to beat the mixture. Keep going until you achieve stiff peaks. This means the meringue stands tall and holds its shape. The mixture should also look glossy and smooth—just like a shiny cloud!
Step 4: Flavor the Meringue
Now, let’s add some flavor! Gently mix in the vanilla and almond extracts. These will give your meringues a lovely aroma and taste. Just a little splash goes a long way, enhancing the overall experience of your Ghost Meringue Cookies.
Step 5: Pipe the Ghost Shapes
Time to get creative! Transfer the meringue to a piping bag fitted with a round tip. If you don’t have a piping bag, a zip-top bag with a corner snipped off works just fine. Pipe ghost shapes onto the prepared baking sheet. Don’t worry about perfection; the more whimsical, the better!
Step 6: Add Chocolate Chip Eyes
Now for the fun part—adding eyes! Place mini chocolate chips on each ghost to create their spooky expressions. You can get creative here; try using different types of chocolate or even candy eyes for a more playful look!
Step 7: Bake the Meringues
Pop your baking sheet into the preheated oven and bake for 1 to 1.5 hours. Keep an eye on them! You’ll know they’re done when they’re dry to the touch and can be easily lifted off the parchment. They should look like little ghostly clouds, ready to haunt your taste buds!
Step 8: Cool the Meringues
Once baked, turn off the oven and let the meringues cool completely inside. This step is essential; it allows them to dry out further and become crisp. Trust me, the wait will be worth it when you take that first bite!
Tips for Success
- Ensure your mixing bowl and beaters are completely clean and dry for the best results.
- Use room temperature egg whites for easier whipping.
- Don’t rush the sugar addition; adding it gradually helps achieve that perfect glossy texture.
- Experiment with food coloring for a festive twist!
- Store meringue cookies in an airtight container to keep them crisp and fresh.
Equipment Needed
- Electric Mixer: A hand mixer works well, but a stand mixer is even better for hands-free whipping.
- Baking Sheet: Any flat baking sheet will do; just make sure it’s lined with parchment paper.
- Piping Bag: If you don’t have one, a zip-top bag with a corner cut off is a great alternative.
- Mixing Bowl: Use a glass or metal bowl for best results; avoid plastic, as it can retain grease.
Variations
- Chocolate Meringue: Add cocoa powder to the meringue for a rich chocolate flavor. Just a couple of tablespoons will do the trick!
- Colorful Ghosts: Use food coloring to tint the meringue. Pastel shades can create a whimsical look, while vibrant colors add a fun twist.
- Nutty Flavor: Swap out the almond extract for hazelnut or coconut extract for a unique flavor profile.
- Spiced Meringues: Add a pinch of cinnamon or nutmeg to the meringue for a warm, cozy flavor that’s perfect for fall.
- Vegan Option: Use aquafaba (the liquid from canned chickpeas) instead of egg whites for a plant-based version of these delightful cookies.
Serving Suggestions
- Pair your Ghost Meringue Cookies with a warm cup of spiced apple cider for a cozy treat.
- Serve them on a festive platter, surrounded by mini pumpkins or autumn leaves for a charming display.
- For a fun twist, stack them in a jar and tie a spooky ribbon around it!
FAQs about Ghost Meringue Cookies
As I’ve shared my love for Ghost Meringue Cookies, I often get questions from fellow home cooks. Here are some of the most common queries I’ve encountered, along with my answers to help you on your meringue journey!
Can I make Ghost Meringue Cookies ahead of time?
Absolutely! These cookies store well in an airtight container for up to a week. Just make sure they’re completely cool before storing to keep them crisp.
What can I do if my meringue doesn’t form stiff peaks?
If your meringue isn’t reaching stiff peaks, it could be due to grease in your bowl or beaters. Ensure everything is squeaky clean. Also, make sure your egg whites are at room temperature for the best results!
Can I use a different flavor extract?
Yes! Feel free to experiment with different extracts like coconut or hazelnut. Just remember to adjust the amount to suit your taste. The beauty of Ghost Meringue Cookies is their versatility!
How do I know when the meringues are done baking?
Your meringues are ready when they feel dry to the touch and can be easily lifted off the parchment paper. They should look light and airy, like little ghostly clouds!
Can I add food coloring to the meringue?
Definitely! Adding food coloring can make your Ghost Meringue Cookies even more festive. Just a few drops will do the trick, and you can create a whole rainbow of spooky treats!
Final Thoughts
Making Ghost Meringue Cookies is more than just baking; it’s about creating memories and sharing joy with loved ones. The process is simple, yet the results are enchanting, bringing smiles to faces young and old. Whether you’re hosting a Halloween party or just looking for a fun treat, these cookies are sure to delight. Plus, they’re a fantastic way to involve your kids in the kitchen, sparking their creativity. So, roll up your sleeves, embrace the spooky spirit, and enjoy the sweet satisfaction of crafting these delightful meringues. Happy baking!
Print
Ghost Meringue Cookies: Spooky Treats You’ll Love!
- Total Time: 1 hour 50 minutes
- Yield: 24 cookies 1x
- Diet: Vegetarian
Description
Delightfully spooky Ghost Meringue Cookies that are perfect for Halloween or any festive occasion.
Ingredients
- 3 large egg whites
- 1/4 teaspoon cream of tartar
- 3/4 cup granulated sugar
- 1 teaspoon vanilla extract
- 1/4 teaspoon almond extract
- Chocolate chips (for eyes)
Instructions
- Preheat your oven to 225°F (110°C) and line a baking sheet with parchment paper.
- In a clean, dry bowl, beat the egg whites and cream of tartar until soft peaks form.
- Gradually add the sugar, continuing to beat until stiff peaks form and the mixture is glossy.
- Mix in the vanilla and almond extracts.
- Transfer the meringue to a piping bag fitted with a round tip.
- Pipe ghost shapes onto the prepared baking sheet.
- Place chocolate chips on each ghost for eyes.
- Bake for 1 to 1.5 hours, or until the meringues are dry and can be easily lifted off the parchment.
- Turn off the oven and let the meringues cool completely inside.
Notes
- Ensure that your mixing bowl and beaters are completely clean and dry for best results.
- Store meringue cookies in an airtight container to keep them crisp.
- Feel free to add food coloring to the meringue for a fun twist.
- Prep Time: 20 minutes
- Cook Time: 1 hour 30 minutes
- Category: Dessert
- Method: Baking
- Cuisine: American
Nutrition
- Serving Size: 1 cookie
- Calories: 30
- Sugar: 7g
- Sodium: 5mg
- Fat: 0g
- Saturated Fat: 0g
- Unsaturated Fat: 0g
- Trans Fat: 0g
- Carbohydrates: 7g
- Fiber: 0g
- Protein: 1g
- Cholesterol: 0mg