Introduction to Pumpkin Patch Cupcakes
As the leaves turn and the air gets crisp, there’s nothing quite like the warmth of freshly baked Pumpkin Patch Cupcakes to bring a smile to your face. These delightful treats are not just a feast for the eyes; they’re a quick solution for busy days filled with family activities. I love how they capture the essence of fall, making them perfect for gatherings or cozy nights at home. Plus, they’re simple enough to whip up even when life gets hectic. Trust me, your loved ones will be impressed, and you’ll feel like a baking superstar!
Why You’ll Love This Pumpkin Patch Cupcakes
These Pumpkin Patch Cupcakes are a delightful blend of ease and flavor. They come together quickly, making them perfect for busy moms like us. The warm spices and creamy frosting create a taste that’s simply irresistible. Plus, the fun decorations turn them into a festive centerpiece for any gathering. Whether it’s a school event or a cozy family dinner, these cupcakes will surely bring joy to your table!
Ingredients for Pumpkin Patch Cupcakes
Gathering the right ingredients is the first step to creating these delightful Pumpkin Patch Cupcakes. Here’s what you’ll need:
- All-purpose flour: This is the base of your cupcakes, providing structure and texture.
- Granulated sugar: Adds sweetness and helps create a tender crumb.
- Brown sugar: Brings a hint of caramel flavor and moisture to the cupcakes.
- Baking powder: A leavening agent that helps the cupcakes rise beautifully.
- Baking soda: Works with the acidic pumpkin to create a light texture.
- Ground cinnamon: Infuses warm, cozy flavors that scream fall.
- Ground nutmeg: Adds a subtle spice that complements the pumpkin perfectly.
- Salt: Enhances the sweetness and balances the flavors.
- Vegetable oil: Keeps the cupcakes moist and tender.
- Canned pumpkin puree: The star ingredient that gives these cupcakes their signature flavor and moisture.
- Large eggs: Bind the ingredients together and add richness.
- Vanilla extract: A splash of vanilla elevates the overall flavor.
- Cream cheese frosting: The perfect creamy topping that adds a tangy sweetness.
- Green and orange candy melts: These are for decorating, turning your cupcakes into a festive pumpkin patch.
- Chocolate cookie crumbs: Sprinkle these around for a fun ‘dirt’ effect.
For those looking to enhance the pumpkin flavor, consider using pumpkin pie spice instead of individual spices. You can find all these ingredients at your local grocery store, and exact quantities are listed at the bottom of the article for easy printing!
How to Make Pumpkin Patch Cupcakes
Step 1: Preheat and Prepare
First things first, preheat your oven to 350°F (175°C). This step is crucial for getting those Pumpkin Patch Cupcakes to rise perfectly. While the oven warms up, line a cupcake pan with your favorite cupcake liners. I love using festive designs that match the fall theme. It adds a little extra charm to your treats and makes them even more inviting!
Step 2: Mix Dry Ingredients
In a large mixing bowl, whisk together the all-purpose flour, granulated sugar, brown sugar, baking powder, baking soda, ground cinnamon, ground nutmeg, and salt. This is where the magic begins! Make sure everything is well combined, as this will ensure your cupcakes have a consistent flavor and texture. The warm spices will fill your kitchen with a delightful aroma, making it hard to resist sneaking a taste!
Step 3: Combine Wet Ingredients
In another bowl, mix together the vegetable oil, canned pumpkin puree, eggs, and vanilla extract. Whisk until everything is well combined and smooth. This mixture is the heart of your cupcakes, bringing moisture and flavor. The vibrant orange of the pumpkin puree is a beautiful sight, reminding me of cozy autumn days spent with family. It’s a comforting blend that sets the stage for deliciousness!
Step 4: Combine Wet and Dry Mixtures
Now, it’s time to bring the two mixtures together! Gradually add the wet ingredients to the dry ingredients, stirring gently until just combined. Be careful not to overmix; a few lumps are perfectly fine. This step is like a dance, where the dry and wet ingredients come together to create a harmonious batter. The anticipation builds as you see the colors blend beautifully!
Step 5: Fill Cupcake Liners
Using a spoon or a cookie scoop, fill each cupcake liner about two-thirds full with the batter. This allows room for the cupcakes to rise without overflowing. I find that using a scoop makes this step so much easier and less messy! As you fill each liner, imagine the joy these cupcakes will bring to your loved ones. It’s a small act of love that goes a long way!
Step 6: Bake the Cupcakes
Place the cupcake pan in the preheated oven and bake for 18-20 minutes. To check for doneness, insert a toothpick into the center of a cupcake; it should come out clean. The smell wafting through your kitchen will be heavenly! Keep an eye on them, as every oven is a little different. You want them to be golden brown and perfectly baked!
Step 7: Cool and Frost
Once baked, remove the cupcakes from the oven and let them cool in the pan for about 5 minutes. Then, transfer them to a wire rack to cool completely. Patience is key here! Once they’re cool, it’s time to frost each cupcake generously with cream cheese frosting. The creamy topping adds a delightful tang that pairs perfectly with the pumpkin flavor. You’ll want to make sure each cupcake is beautifully frosted!
Step 8: Decorate for the Pumpkin Patch
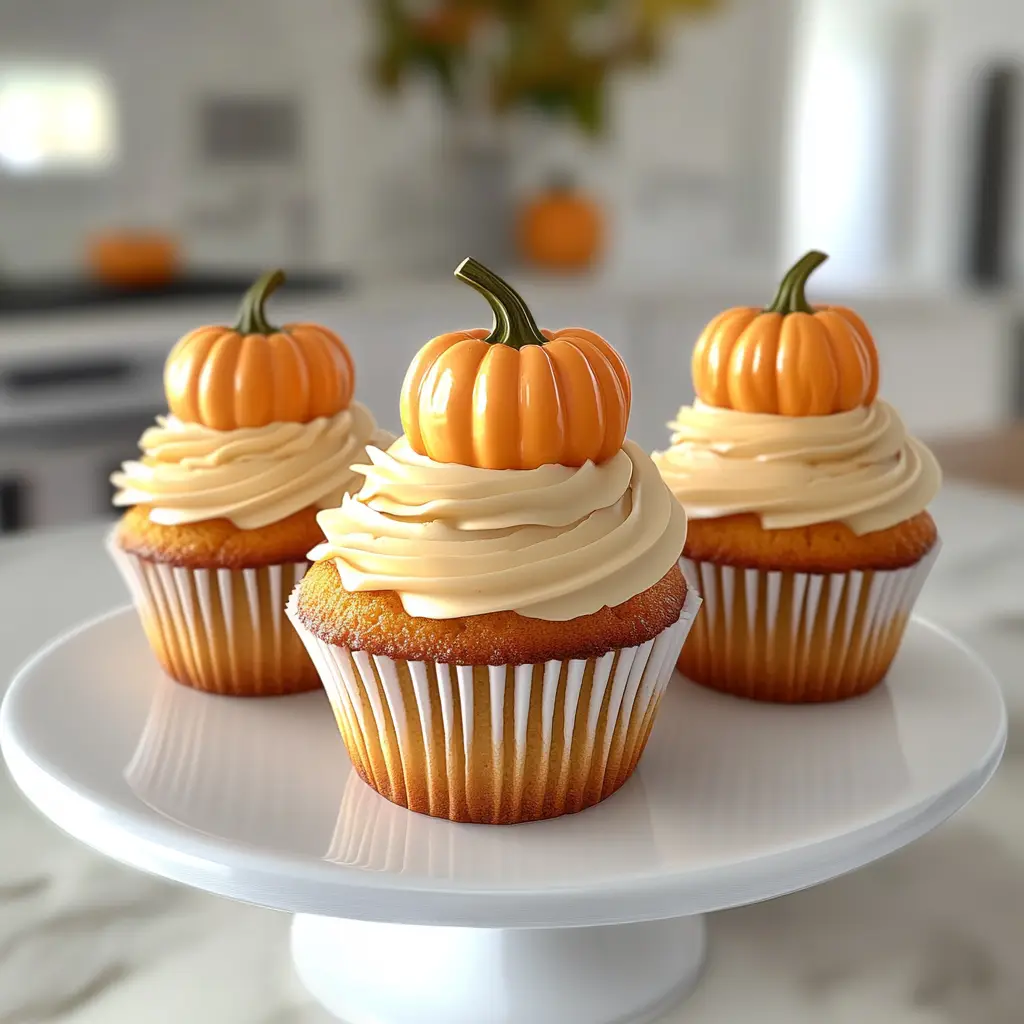
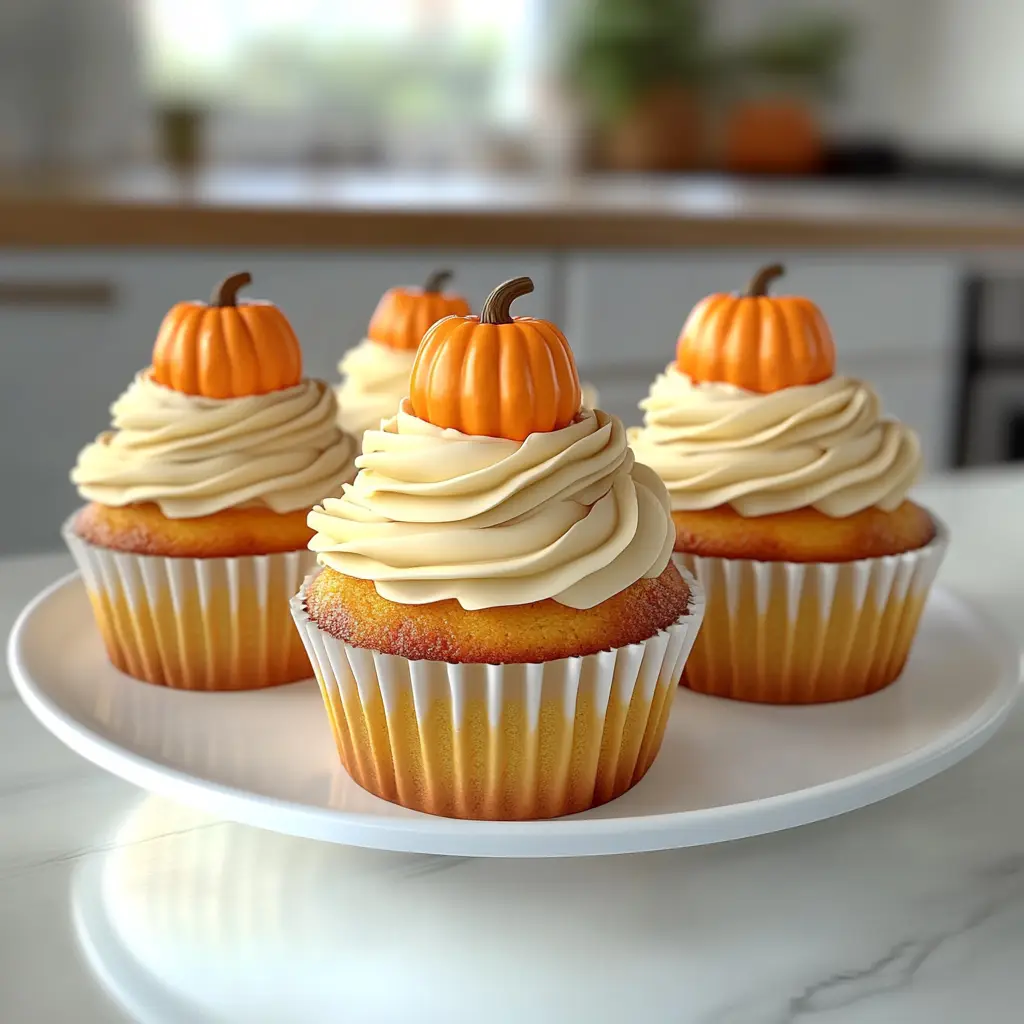
Now comes the fun part—decorating! Melt the green and orange candy melts according to package instructions. Use them to create little pumpkins on top of the frosted cupcakes. Then, sprinkle chocolate cookie crumbs around the base for that ‘dirt’ effect. It’s like creating your own little pumpkin patch! Your family will be amazed at how festive and fun these cupcakes look!
Tips for Success
- Always measure your ingredients accurately for the best results.
- Let the cupcakes cool completely before frosting to prevent melting.
- Use a cookie scoop for even batter distribution.
- Experiment with different decorations to make your cupcakes unique.
- Store leftovers in an airtight container to keep them fresh.
Equipment Needed
- Oven: A standard kitchen oven works perfectly.
- Mixing bowls: Use any size, but a large bowl is ideal for mixing.
- Whisk: A hand whisk or electric mixer will do the job.
- Cookie scoop: This makes filling liners a breeze.
- Wire rack: Essential for cooling the cupcakes evenly.
Variations
- Gluten-Free: Substitute all-purpose flour with a gluten-free blend to make these cupcakes suitable for gluten-sensitive friends.
- Vegan: Replace eggs with flaxseed meal (1 tablespoon flaxseed meal + 2.5 tablespoons water per egg) and use a plant-based cream cheese for frosting.
- Spiced Up: Add a pinch of cayenne pepper or ginger for an extra kick of flavor that complements the pumpkin.
- Nutty Twist: Fold in chopped walnuts or pecans into the batter for added texture and flavor.
- Chocolate Lovers: Mix in chocolate chips for a delicious chocolate-pumpkin fusion that will satisfy any sweet tooth.
Serving Suggestions
- Pair these Pumpkin Patch Cupcakes with a warm cup of spiced chai or apple cider for a cozy treat.
- Serve them on a festive platter adorned with autumn leaves for a charming presentation.
- Consider adding a scoop of vanilla ice cream on the side for an extra indulgence.
FAQs about Pumpkin Patch Cupcakes
Can I make these Pumpkin Patch Cupcakes ahead of time?
Absolutely! You can bake the cupcakes a day in advance. Just frost them on the day you plan to serve for the freshest taste. This is a great time-saver for busy schedules!
What can I use instead of canned pumpkin puree?
If you don’t have canned pumpkin puree, you can use homemade pumpkin puree. Just roast and blend fresh pumpkin until smooth. It’s a wonderful way to use seasonal pumpkins!
How should I store leftover cupcakes?
Store any leftover Pumpkin Patch Cupcakes in an airtight container at room temperature for up to three days. If you want to keep them longer, consider refrigerating them, but let them come to room temperature before serving.
Can I freeze these cupcakes?
Yes, you can freeze the cupcakes! Just make sure they are completely cooled and frosted. Wrap them tightly in plastic wrap and place them in a freezer-safe container. They’ll stay fresh for up to three months!
What can I use for decoration besides candy melts?
If candy melts aren’t your thing, you can use fondant to create pumpkins or even pipe colored frosting for decoration. Get creative with your toppings—chocolate sprinkles or edible glitter can add a fun touch!
Final Thoughts
Making these Pumpkin Patch Cupcakes is more than just baking; it’s about creating memories. The joy on my family’s faces as they bite into these festive treats is priceless. Each cupcake is a little piece of autumn magic, bringing warmth and happiness to our home. Whether you’re celebrating a special occasion or simply enjoying a cozy evening, these cupcakes are sure to delight. So, roll up your sleeves, embrace the fall spirit, and let the aroma of pumpkin and spices fill your kitchen. Trust me, you’ll be glad you did!