Introduction to Homemade Caramels
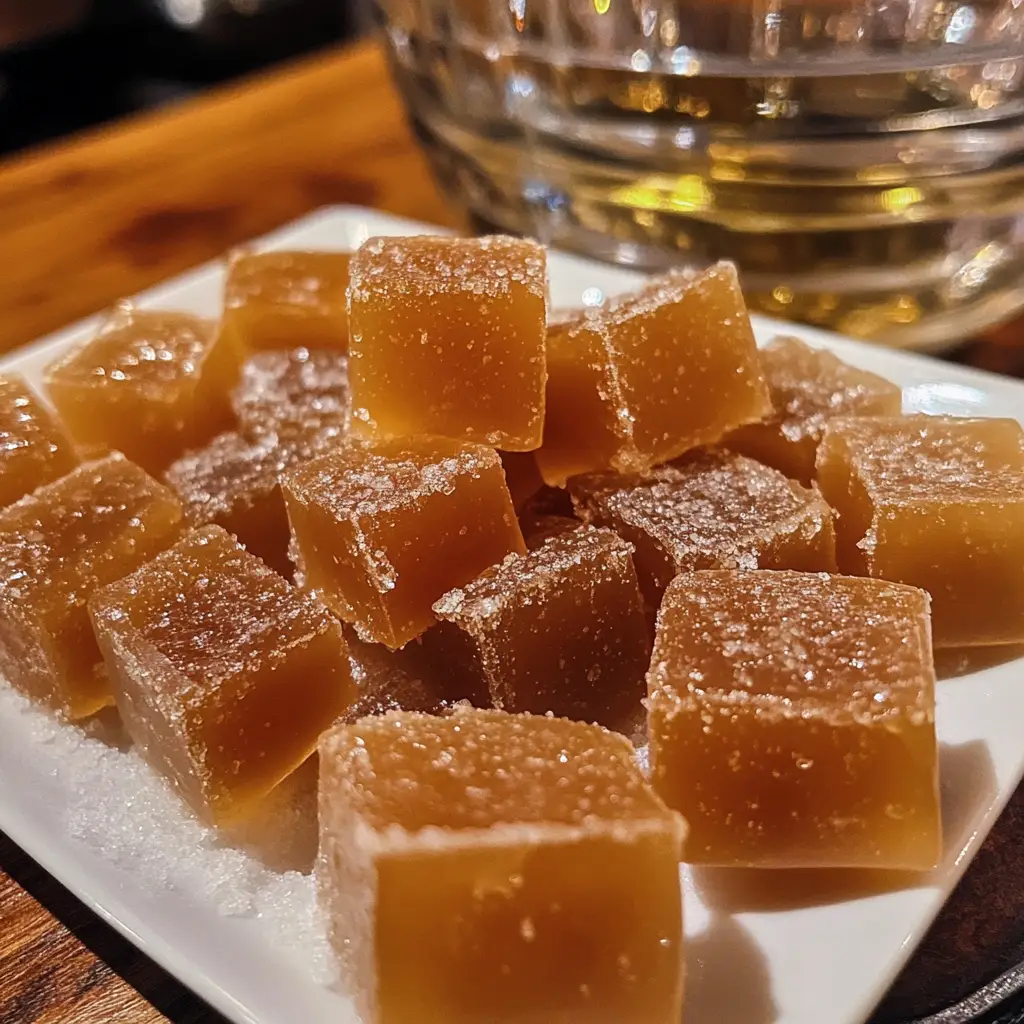
There’s something magical about the smell of homemade caramels wafting through the kitchen. It takes me back to my childhood, where sweet treats were a symbol of love and comfort. If you’re a busy mom or professional like me, you know how precious time is. This homemade caramels recipe is not just a quick solution for a hectic day; it’s a delightful way to impress your loved ones. With just a few simple ingredients, you can create rich, chewy caramels that are perfect for sharing or savoring all by yourself. Trust me, your taste buds will thank you!
Why You’ll Love This Homemade Caramels
These homemade caramels are a game-changer for anyone short on time but big on flavor. They come together quickly, making them perfect for busy days. The rich, buttery taste is simply irresistible, and the chewy texture will have you reaching for more. Plus, they make fantastic gifts! Imagine the smiles on your friends’ faces when they receive a box of these sweet delights. It’s a win-win for everyone!
Ingredients for Homemade Caramels
Gathering the right ingredients is the first step to creating your delicious homemade caramels. Here’s what you’ll need:
- Unsalted Butter: This is the base of your caramels, providing richness and a smooth texture. Unsalted is best, as it allows you to control the saltiness.
- Granulated Sugar: The sweet star of the show! It caramelizes beautifully, giving your candies that classic sweet flavor.
- Light Corn Syrup: This ingredient helps prevent crystallization, ensuring your caramels are perfectly chewy and smooth.
- Sweetened Condensed Milk: This creamy addition adds sweetness and a luscious texture, making your caramels melt in your mouth.
- Vanilla Extract: A splash of vanilla enhances the flavor, adding warmth and depth to your caramels.
- Salt: Just a pinch balances the sweetness and elevates the overall flavor. You can even sprinkle a bit of sea salt on top for a gourmet touch!
For those looking to experiment, consider adding a dash of espresso powder for a coffee twist or a hint of sea salt for a salted caramel version. You can find all the exact measurements at the bottom of the article, ready for printing!

How to Make Homemade Caramels
Now that you have your ingredients ready, let’s dive into the sweet adventure of making homemade caramels! Follow these simple steps, and you’ll be rewarded with a batch of chewy, buttery goodness.
Step 1: Prepare Your Baking Dish
Start by lining an 8×8 inch baking dish with parchment paper. This little trick makes it super easy to remove the caramels later. Just leave some overhang on the sides; it acts like a handle when it’s time to lift out your delicious creation!
Step 2: Melt the Butter
In a large saucepan, melt your unsalted butter over medium heat. This step is crucial because it sets the foundation for your caramels. If you melt it too quickly, you risk burning it, which can ruin the flavor. So, take your time and let it melt gently.
Step 3: Combine Ingredients
Once the butter is melted, it’s time to add the granulated sugar, light corn syrup, and salt. Stir everything together until it’s well combined. This mixture is the heart of your homemade caramels, so make sure it’s smooth and cohesive!
Step 4: Bring to a Boil
Now, bring the mixture to a boil while stirring constantly. This is where the magic happens! Boiling helps to dissolve the sugar completely and creates that lovely caramel flavor. Keep your eyes on it; you don’t want it to burn!
Step 5: Add Sweetened Condensed Milk
Once boiling, reduce the heat to low and carefully stir in the sweetened condensed milk. This creamy addition is what makes your caramels rich and luscious. Stir until it’s fully incorporated, and you’ll see the mixture transform into something truly special.
Step 6: Cook to Soft Ball Stage
Continue to cook the mixture, stirring frequently, until it reaches the soft ball stage. This is about 240°F (115°C). You can test it by dropping a small amount into cold water; if it forms a soft ball, you’re good to go! This step is key for that perfect chewy texture.
Step 7: Stir in Vanilla Extract
Once you’ve reached the right temperature, remove the saucepan from heat and stir in the vanilla extract. This final touch adds a warm, inviting flavor that elevates your homemade caramels to a whole new level. Trust me, you’ll want to savor this moment!
Step 8: Cool and Cut
Pour the caramel mixture into your prepared baking dish and let it cool completely. Once it’s set, use the parchment overhang to lift it out. Cut into squares, and voilà! You have a batch of homemade caramels ready to be enjoyed or gifted.
Tips for Success
- Always stir constantly while cooking to prevent burning.
- Use a candy thermometer for accurate temperature readings.
- Let the caramels cool completely before cutting for clean edges.
- For a fun twist, try adding flavors like almond or coconut extract.
- Wrap individual caramels in wax paper for easy gifting and storage.
Equipment Needed
- Large Saucepan: A heavy-bottomed pan works best to distribute heat evenly.
- Candy Thermometer: This is essential for checking the temperature. If you don’t have one, a simple cold water test will do!
- Parchment Paper: Use this to line your baking dish for easy removal.
- Spatula: A silicone spatula is great for stirring and scraping the sides.
Variations of Homemade Caramels
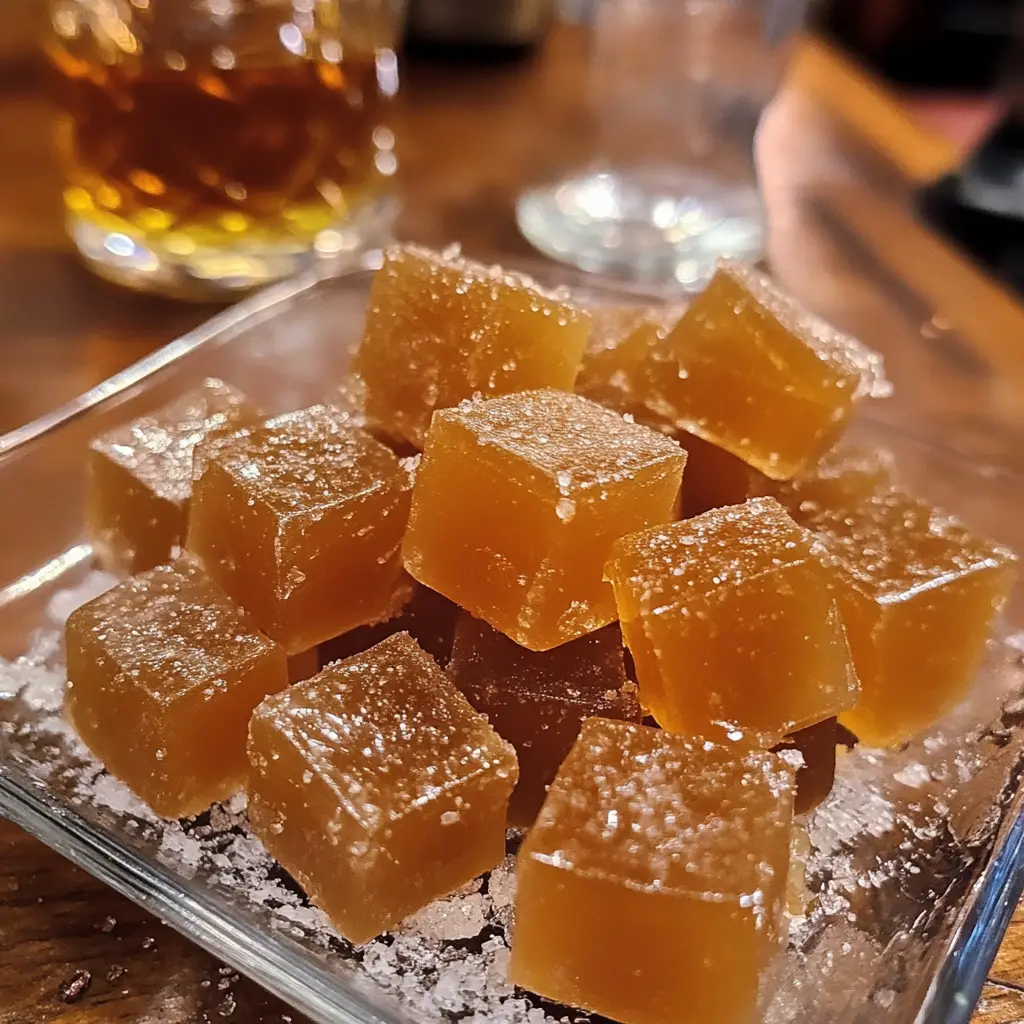
- Salted Caramels: Add a sprinkle of sea salt on top before the caramels cool for a delightful sweet and salty contrast.
- Chocolate-Dipped Caramels: Once cut, dip the caramels in melted chocolate for an indulgent treat that’s hard to resist.
- Nutty Caramels: Stir in chopped nuts like pecans or almonds for added crunch and flavor.
- Spiced Caramels: Add a pinch of cinnamon or nutmeg to the mixture for a warm, cozy flavor that’s perfect for fall.
- Vegan Caramels: Substitute coconut cream for sweetened condensed milk and use vegan butter for a plant-based version.
Serving Suggestions for Homemade Caramels
- Pair your homemade caramels with a cup of rich coffee or hot chocolate for a cozy treat.
- Serve them alongside a cheese platter for a sweet and savory combination that will impress guests.
- Wrap caramels in decorative paper and present them in a beautiful box for a thoughtful gift.
- Top vanilla ice cream with warm caramels for an indulgent dessert.
FAQs about Homemade Caramels
As I’ve shared my homemade caramels recipe, I often get questions from fellow home cooks. Here are some of the most common queries, along with my answers to help you on your caramel-making journey!
Can I use brown sugar instead of granulated sugar?
Absolutely! Using brown sugar will give your caramels a deeper, more complex flavor. Just keep in mind that the texture might be slightly different, but it’s a delicious variation!
How do I store homemade caramels?
Store your homemade caramels in an airtight container at room temperature. They’ll stay fresh for about two weeks. If you want to keep them longer, you can refrigerate them, but let them come to room temperature before enjoying.
What if my caramels are too hard?
If your caramels turn out too hard, it’s likely they were cooked too long. Next time, keep a close eye on the temperature and test for the soft ball stage. You can also try adding a bit of cream to soften them up when reheating.
Can I make these caramels dairy-free?
Yes! To make dairy-free caramels, substitute the unsalted butter with a dairy-free alternative and use coconut cream instead of sweetened condensed milk. You’ll still get that rich, chewy texture!
How can I make my caramels more flavorful?
There are so many ways to enhance the flavor of your homemade caramels! Consider adding extracts like almond or coconut, or even a pinch of sea salt for that gourmet touch. The possibilities are endless!
Final Thoughts
Making homemade caramels is more than just a cooking project; it’s a delightful experience that brings joy to both the maker and the lucky recipients. The rich aroma filling your kitchen, the anticipation of that first chewy bite, and the smiles on your loved ones’ faces are truly priceless. Whether you’re treating yourself or gifting these sweet treasures, each caramel is a little piece of happiness. So, roll up your sleeves, gather your ingredients, and embark on this sweet adventure. Trust me, you’ll find that the joy of homemade caramels is simply irresistible!
Print
Homemade Caramels: Discover the Secret Recipe Today!
- Total Time: 45 minutes
- Yield: Approximately 64 caramels 1x
- Diet: Vegetarian
Description
A delightful recipe for making homemade caramels that are rich, chewy, and perfect for gifting or enjoying yourself.
Ingredients
- 1 cup unsalted butter
- 2 cups granulated sugar
- 1 cup light corn syrup
- 1 can (14 oz) sweetened condensed milk
- 1 teaspoon vanilla extract
- 1/2 teaspoon salt
Instructions
- Prepare an 8×8 inch baking dish by lining it with parchment paper.
- In a large saucepan, melt the butter over medium heat.
- Add the sugar, corn syrup, and salt to the melted butter, stirring until combined.
- Bring the mixture to a boil, stirring constantly.
- Once boiling, reduce the heat to low and add the sweetened condensed milk.
- Continue to cook, stirring frequently, until the mixture reaches a soft ball stage (about 240°F or 115°C).
- Remove from heat and stir in the vanilla extract.
- Pour the caramel mixture into the prepared baking dish and let it cool completely.
- Once cooled, cut into squares and wrap in wax paper.
Notes
- Make sure to stir constantly to prevent burning.
- For a richer flavor, you can add a pinch of sea salt on top before it cools.
- Store in an airtight container at room temperature.
- Prep Time: 15 minutes
- Cook Time: 30 minutes
- Category: Candy
- Method: Stovetop
- Cuisine: American
Nutrition
- Serving Size: 1 caramel
- Calories: 70
- Sugar: 10g
- Sodium: 15mg
- Fat: 3g
- Saturated Fat: 2g
- Unsaturated Fat: 1g
- Trans Fat: 0g
- Carbohydrates: 10g
- Fiber: 0g
- Protein: 0g
- Cholesterol: 10mg