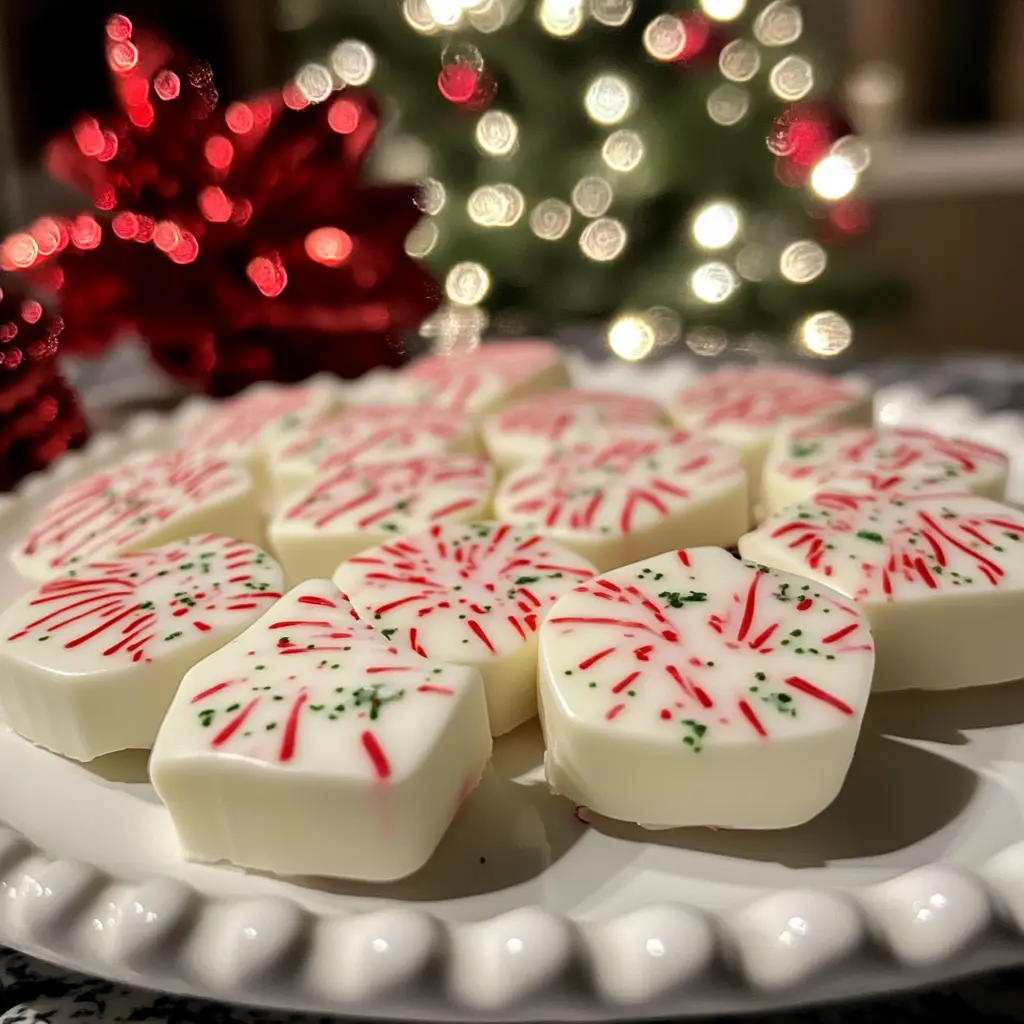
Introduction to Christmas Mints
As the holiday season approaches, I find myself dreaming of sweet treats that bring joy to my family. Christmas Mints are one of those delightful, refreshing confections that perfectly capture the spirit of the season. They’re not just easy to make; they’re a quick solution for busy days filled with holiday preparations. Imagine the smiles on your loved ones’ faces when they taste these minty chocolate wonders! With just a few simple ingredients, you can whip up a batch of Christmas Mints that will impress everyone at your holiday gatherings.
Why You’ll Love This Christmas Mints
These Christmas Mints are a holiday miracle in the kitchen! They come together in just 25 minutes, making them perfect for busy moms and professionals like us. The combination of rich chocolate and refreshing mint is simply irresistible. Plus, they’re a hit with kids and adults alike, ensuring everyone leaves your holiday gatherings with a smile. Trust me, once you try these, they’ll become a cherished tradition in your home!
Ingredients for Christmas Mints
Gathering the right ingredients is the first step to creating these delightful Christmas Mints. Here’s what you’ll need:
- Granulated Sugar: This sweetener forms the base of our mints, providing that essential sweetness.
- Unsweetened Cocoa Powder: It adds a rich chocolate flavor, making these mints a true treat for chocolate lovers.
- Milk: This ingredient helps to create a smooth and creamy texture, binding everything together beautifully.
- Butter: A touch of butter adds richness and depth to the mints, enhancing their overall flavor.
- Peppermint Extract: This is the star of the show! It gives the mints their refreshing minty kick. Adjust the amount to suit your taste.
- Powdered Sugar: This sugar helps to achieve a smooth consistency, making the mints easy to shape and dip.
- Semi-Sweet Chocolate Chips: These are for dipping, adding a luscious chocolate coating that complements the mint perfectly.
For a festive twist, consider adding crushed candy canes on top of the chocolate before it hardens. You can find all the exact measurements for these ingredients at the bottom of the article, ready for printing. Happy cooking!
How to Make Christmas Mints
Making Christmas Mints is a delightful journey that fills your kitchen with the sweet aroma of chocolate and mint. Follow these simple steps, and you’ll have a batch of these festive treats ready in no time!
Step 1: Combine Ingredients
Start by grabbing a medium saucepan. In it, mix together the granulated sugar, unsweetened cocoa powder, milk, and butter. Stir gently until everything is well combined. The mixture should look like a thick paste. This is the foundation of your Christmas Mints, so make sure it’s mixed thoroughly!
Step 2: Heat the Mixture
Now, place the saucepan over medium heat. Keep stirring as the mixture heats up. You want to bring it to a gentle boil. Once it starts bubbling, let it boil for exactly one minute. This step is crucial because it helps to create that perfect texture for your mints.
Step 3: Add Peppermint Extract
After boiling, remove the saucepan from the heat. This is the moment to add the peppermint extract. Stir it in quickly! The heat will help release the minty aroma, making your kitchen smell heavenly. Adjust the amount if you prefer a stronger mint flavor; it’s all about your taste!
Step 4: Mix in Powdered Sugar
Next, let the mixture cool slightly for a few minutes. Once it’s not too hot, add the powdered sugar. Stir until it’s completely smooth. This will give your mints that delightful, melt-in-your-mouth texture. If it feels too thick, don’t hesitate to add a splash of milk to loosen it up.
Step 5: Shape the Mints
Now comes the fun part! Using a spoon, drop spoonfuls of the mixture onto a sheet of wax paper. Space them out a bit, as they will spread slightly as they set. Let them sit at room temperature until they firm up. This usually takes about 30 minutes, but you can pop them in the fridge to speed things up!
Step 6: Dip in Chocolate
While your mints are setting, it’s time to melt the chocolate chips. You can do this in a microwave-safe bowl or a double boiler. If using a microwave, heat in 30-second intervals, stirring in between until smooth. Once melted, dip each mint into the chocolate, ensuring they’re fully coated. Let the excess chocolate drip off before placing them back on the wax paper.
Step 7: Cool and Harden
Finally, let the chocolate-covered mints cool on the wax paper. This will take about 30 minutes at room temperature. If you’re in a hurry, you can place them in the fridge for quicker hardening. Once set, they’re ready to be enjoyed or gifted!
Tips for Success
- Make sure to stir constantly while heating to prevent burning.
- Use a cookie scoop for even-sized mints; it makes shaping easier!
- For a fun twist, try adding a dash of food coloring to the chocolate.
- Keep your workspace clean; it makes the process smoother.
- Don’t rush the cooling process; patience leads to perfect mints!

Equipment Needed
- Medium Saucepan: A regular pot works too if you don’t have one.
- Wooden Spoon: A spatula can also do the trick for stirring.
- Wax Paper: Parchment paper is a great alternative for setting the mints.
- Microwave-Safe Bowl: Any heatproof bowl can be used for melting chocolate.
- Cookie Scoop: A tablespoon works well for shaping mints if you don’t have one.
Variations
- Dark Chocolate Dipping: Swap semi-sweet chocolate chips for dark chocolate for a richer flavor.
- White Chocolate Drizzle: Drizzle melted white chocolate over the cooled mints for a festive touch.
- Nutty Twist: Add crushed nuts like almonds or walnuts to the mint mixture for added crunch.
- Vegan Option: Use coconut milk and dairy-free butter to make these mints vegan-friendly.
- Flavor Infusion: Experiment with different extracts like vanilla or almond for a unique flavor profile.
Serving Suggestions
- Pair these Christmas Mints with a warm cup of hot cocoa for a cozy treat.
- Serve them on a festive platter, garnished with sprigs of mint or holly for a holiday touch.
- Include them in gift boxes alongside homemade cookies for a delightful surprise.
- Offer them as a sweet finish to a holiday dinner, alongside coffee or tea.
- For a fun twist, create a minty dessert bar where guests can customize their toppings!
FAQs about Christmas Mints
Can I make Christmas Mints ahead of time?
Absolutely! These mints can be made a week in advance. Just store them in an airtight container to keep them fresh. They make for a perfect holiday treat that you can prepare ahead of time!
How should I store Christmas Mints?
To keep your Christmas Mints fresh, store them in an airtight container at room temperature. They’ll stay delicious for up to two weeks. If you live in a warm climate, consider refrigerating them to prevent melting.
Can I use different types of chocolate for dipping?
Yes! Feel free to experiment with dark, milk, or even white chocolate. Each type will give your Christmas Mints a unique flavor twist. Just remember to adjust the sweetness if you choose a sweeter chocolate.
What can I do if my mint mixture is too thick?
If your mixture feels too thick, simply add a splash of milk to loosen it up. This will help achieve that smooth, creamy texture that makes these Christmas Mints so delightful!
Can I add other flavors to my Christmas Mints?
Definitely! You can infuse your mints with different extracts like vanilla or almond for a unique flavor. Just remember to adjust the amount of peppermint extract accordingly to maintain that refreshing minty taste.
Final Thoughts
Creating Christmas Mints is more than just a recipe; it’s a joyful experience that brings the family together. The delightful combination of mint and chocolate fills your home with warmth and festive cheer. Each bite is a reminder of the love and care you put into making these treats. Whether you’re sharing them with friends or enjoying them with your family, these mints are sure to create sweet memories. So, roll up your sleeves, gather your loved ones, and let the magic of Christmas Mints fill your hearts and homes this holiday season!
Print
Christmas Mints: Discover Delectable Treats Today!
- Total Time: 25 minutes
- Yield: 24 mints 1x
- Diet: Vegetarian
Description
Christmas Mints are delightful, refreshing treats perfect for the holiday season, combining the flavors of mint and chocolate.
Ingredients
- 1 cup granulated sugar
- 1/2 cup unsweetened cocoa powder
- 1/4 cup milk
- 1/4 cup butter
- 1 teaspoon peppermint extract
- 1/2 cup powdered sugar
- 1/2 cup semi-sweet chocolate chips
Instructions
- In a saucepan, combine granulated sugar, cocoa powder, milk, and butter.
- Heat over medium heat, stirring until the mixture comes to a boil.
- Boil for 1 minute, then remove from heat and stir in peppermint extract.
- Allow the mixture to cool slightly, then mix in powdered sugar until smooth.
- Drop spoonfuls of the mixture onto wax paper and let them set.
- Melt chocolate chips in a microwave or double boiler, then dip each mint into the chocolate.
- Place the chocolate-covered mints back on the wax paper to cool and harden.
Notes
- Store mints in an airtight container for up to two weeks.
- For a festive touch, sprinkle crushed candy canes on top of the chocolate before it hardens.
- Adjust the amount of peppermint extract to taste for a stronger or milder mint flavor.
- Prep Time: 15 minutes
- Cook Time: 10 minutes
- Category: Dessert
- Method: Stovetop and dipping
- Cuisine: American
Nutrition
- Serving Size: 1 mint
- Calories: 50
- Sugar: 8g
- Sodium: 5mg
- Fat: 2g
- Saturated Fat: 1g
- Unsaturated Fat: 1g
- Trans Fat: 0g
- Carbohydrates: 10g
- Fiber: 0g
- Protein: 1g
- Cholesterol: 5mg